|
Vuur en vlam
All
other materials available
Here
Take this arrow along to remind you where you have remained
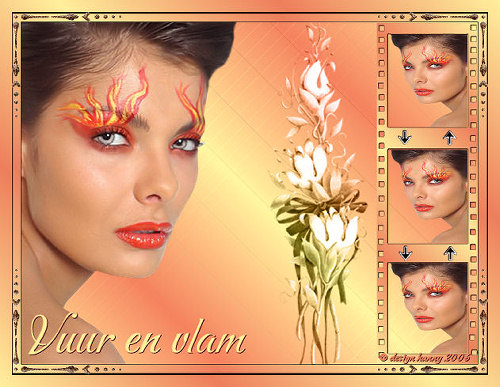
1 - Open a New Image of 800x600px.
2 - Set Foreground to #ed7e5c Background
to #ffef9c.
3 - Floodfill your image with the gradient.
4 - Open the tube with the lady (SS_394). Highlight raster 1.
5 - Return to your work image. 6 - Open your filmstrip tube.
7 - Return to your working image.
8 - Open your lady tube once more 9 - Go back to your filmstrip and select the top square with your Magic Wand. 10 - Edit - Paste into
Selection. Select
None 11 -Repeat this procedure for square 2 and square 3 until everything is on the filmstrip.
12 - Layers: Merge visible layers
13 - Pick up your Magic Wand again and
select the black part in the filmstrip.
14 - Effect Drop Shadow V1 H1 O-100 B-1
color black
15 - Open your flower tube
16 - Edit -Copy.
17 - Image - Add borders:
18 - Open the corner tube. Edit: Copy
19 - Effects - Plugins: Simple filter
- Top Left Mirror
20 - Image - Add borders 15px #ed7e5c
22 - Open your font- I used Carraterre.
23 - Layers - Merge all layers. 24 - Save as jpg file I hope that you all enjoyed this tutorial and that it was written well enough to understand Much love Hanny Tut translated by Tini - thanks very much |