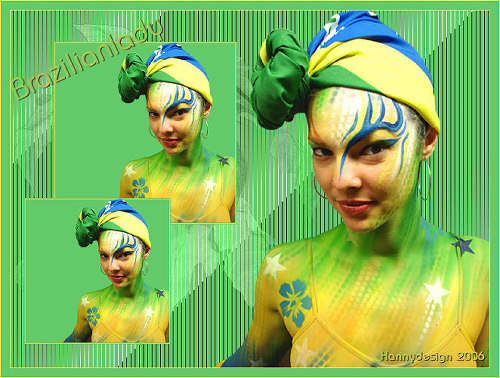
1 - Open a new image 800 high and 600 wide
2 - Set your foreground to #eccb41 and
background to #64ca69
3 - Fill your layer with #64ca69
4 - Open the flower, Copy – Paste as new
layer; lower the layer opacity to
50 % and luminance old
5 - Effects- Andrews filter 8 - Tow The
Line – flower layer - default settings
6 - Open the lady tube – Image -Resize –
600 high; Copy - Paste as new layer –
move this layer to the right
7 - Open a new image – 300 by 300 & lock
aspect ratio not checked – fill with
#64ca69
8 - Layers – Merge Layers
9 - Re-open your Lady tube -Image – Resize
– 300 high- Edit – Copy -Paste as new
layer, slide it over to the right side
of your image
10 - Image – Add borders – 1px #eccb41 –
1px #64ca69 - Edit- Copy -Edit - Paste
as new layer onto your large image
11 - Layers – Duplicate layers ; Image –
Resize 80% - all layer not checked; move
all items in the right place; Layers –
Merge all layers
12 - Open a font of your choice and type
your name or a text; Image – Rotate 25
left
13 - Effects – 3dEffects – Drop shadow –
V1 – H 1 – O 100 – B 1; Add a watermark
if you like; Layers – Merge all layers
14 - Image – Add borders 1-px #eccb41;
15-px #64ca69; 1-px #eccb41
15 - Image – Resize – your choice – I made
mine 500px high; File – Save to jpg
Wishing you lots of success with this
tutorial and I hope that the steps were
easy enough to follow through.
With love, Hanny
