|
Always in my heart
All other materials available HERE
|
Always in my heart
All other materials available HERE
Materials two tubes and two images
Masker 20-20
Save them into the file of your choice
Open in psp
Take along this arrow to where remember you have remained

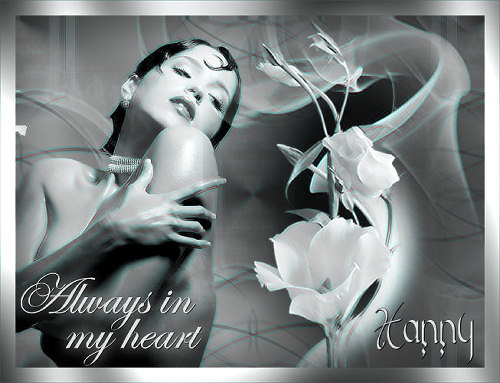
1 - Open a new transparant image 800 width x 600 height select all
2 - Open yokablendin, Copy and paste into the selection.
3 - Open the smoke image, resize to heigth 800 pix, masker load from disk, 20-20 merge group.
4 - Copy and paste this image as a new layer and put it to the right.
5 - Open the tube Woman, image mirror, copy and past as new layer, put it to the left side.
6 - Put your foreground color to #4d89b2 , ajust hue and sat. colorize K145 V101
7 - Open the flower, resize to 600 pix height, Copy and paste as new layer.
Put it to the right but not completely to the right.
Colorize like the lady above.
8 - Merge layers visible. Filters unlimited2 , andrews-8, 3d gliss natrequired
9 - Add borders 1 pix #adc9c9 , add border 15 pix #dfe1e1, add border 1 pix #adc9c9
10 - Select the 10 pix border with your magic wand, effects gregs filters factory output vol 2,
standard settings, add a dropshadow V1 H1 D100 V1
11 - Put a nice text on your creation with a font of your choice,
put your name and or watermark on it, and save as .jpg.
I hope you enjoy this tutorial and hope its clear enough explained.
I wish You a lot of succes, lovely greetings Hanny.
Tutorial translated by Azyzam Designs