|
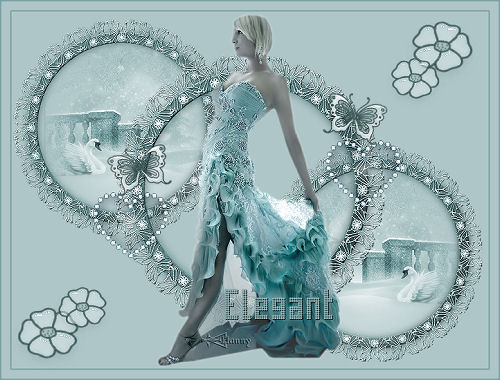
Elegant
All other materials available Here 1 tube and a scrap, a font and a misted tube Open all in psp Save the materials in their designated folders
Take this arrow as a reminder where you are at
1 - Open a new image Width 800, Height 600. select all 2 – Flood flill with color# aec6c8 3 - Open scrap blueslace 4 – Highlight layer Merged, large circle 5 – Edit-copy-paste as new layer 6 – Image resize 80 %, all layers not checked 7 – Adjust – Hue and Satureation H 130 - S 49 8 – Move it to the upper corner on the left 9 –Layers duplicate, move it to the lower corner on the right 10 – Open 1. aufgabe.jpg
Ps Mask Layers Mask from disk 20 to 20 Removing layers next question just click yes
11 – Edit-copy-paste as new layer 12 – Move it in to the left circle, see example 13 – Colorize as in point 7 14 – Layer - duplicate - mirror 15 - Move it to the right circle 16 – Activate your scrap bluelace and highlight the Merged layer with the circle again 17 - Edit-copy-paste as new layer, on your image It’s already in position 18 - Colorize as in point 7
19 – Open 1220640069, the lady It’s already in position 21 - Activate your bluelace scrap 22 - highlight the layer with the heart, number 5 23 – Edit-copy-paste as new layer, on your image, move it to the left, see example 24 – Layer - duplicate - mirror move it up a bit 25 – Activate your bluelace scrap and find the butterfly, layer 3 26 – Edit-copy-paste as new layer, on your image 27 -- Colorize as in point 7 28 – Image- free rotate –left 15 29 - Move it to the place of choice 30 – Layer – duplicate - mirror 31 - Move it to the place of choice 32 – Activate your bluelace scrap and find the flower, layer 6 33 – Edit-copy-paste as new layer, on your image , colorize as in point 7 , move it to the upper right corner 34- Layer – duplicate , resize with 80% and move it in position, see example 35 - Layer – duplicate these 2 layers and move it to the lower left corner, see example 36 – Layers merge – merge all layers (flatten) 37 – Image – add borders 2 pixels # 79a0a2 38 – Image – add borders 15 pixels # aec6c8 39- Image – add borders 2 pixels # 79a0a2 40 – Open text tool and add text and watermark 41 Image resize Height 550 , Width will adjust 42 - Save as jpg compression value 2o Nice lesson with a beautiful result
The lesson is done, have fun, love Hanny
Translate Rita (Friemelien )
|