|
Love Letters
Chigitta tested own creatieve Dankjewel prachtig
All other materials available Here
|
Love Letters
Chigitta tested own creatieve
Dankjewel prachtig
All other materials available Here
Save them into the file of your choice
Open in psp
For this lesson it is not necessary using any filters.
Supplies: 1 tube, background, corner and a font.
Are you ready ?? Let’ s go and follow me :)))
Take along this arrow to where remember you have remained

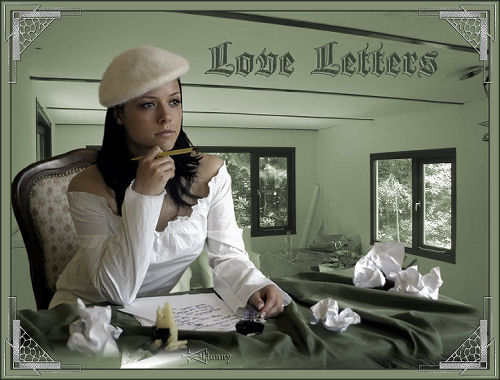
1 - Open a new image, width 800, height 600, select all.
2 - Open Dsc00803(1).
3 - Edit copy – paste into selection – select no none.
4 - Adjust- Hue and Saturation – Colorize H on 60 and V on 29 and opacity
5 - Layer opacity 75.
6 - Open 2506 women 101 Alejandra Rosales 15607.
7 - Image resize height 550, width will adjust.
8 - Edit - paste as new layer.
9 - Put this tube - with the chair on the left- against the edge
and put her a little more to the bottom.
10 - Edit, copy merged.
11 - Image- add borders: 2 px #393e34;
12 - Image- add borders: 15 px #8b957c;
13 - Image- add borders: 2 px #393e34.
14 - Open WM1 Silver-t
15 - Edit - paste as new layer.
16 - Put it left on the top in the corner.
17 - Layers – duplicate and mirror.
18 - Layers - duplicate and invert.
19 - Layers – duplicate and again mirror.
20 - Layers – merge.
21 - Now you can choose the font you like and look for your
a-tool.22 - Put your name in a dropshadow, with these settings:
Vertical: 1; Horizontal: 1; Cover: 100; Blur: 1,00.
23 - Use for the foreground color:#8b957c and for the background color:# 393e34.
24 - Of course you can now add your initials or your watermark. What you want.
25 - Image - resize height to 550, the width adjusts itself.
26 - Export as jpg file – compression value on 20.
27 - Save your lesson under the name you like.
28 - You have done your work and made a nice script.
Thanks and many greetings from Hanny.
Translate from Rina (Moderator)