|
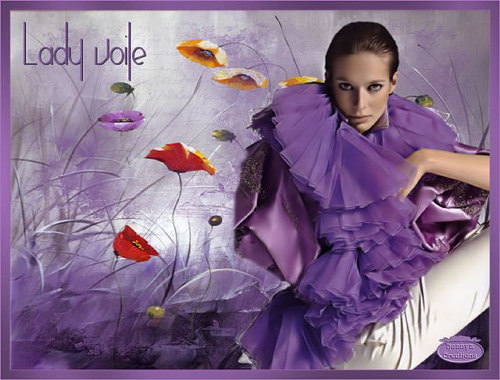
Lady Voile
All
other materials available
Here A graphic, a brush and a tube and Greg's Filter FacoryOutput 2 – Poolshadow Save the materials in their designated folders
Take this arrow as a reminder where you are at
1 - Open your materials in PSP
2 - Open a new image; width 800 px and height 600 px
3 - Select all
4 - Open your graphic klaprozen; Copy; Edit and Paste into Selection; Select none
5 - Open your brush and stamp it 4 times
onto your backround;
6 - Open your tube and remove watermark layer
7 - Edit - Copy; Edit - Paste as New Layer; move it to the right - see the preview
8 - Fetch your Eraser tool and erase a
little from 9 - Layers; Merge visible layers
10 - Image; Add Borders 1 px #a776b7
11 - Image; Add Borders 15 px #7e5694
12 - Image; Add Borders 1px #a7e5694
13 - Select the wide border with you magic wand 14 - Effects - Greg's Factory Output 2 Pool shadow; All sliders set to 50 - the bottom one 128; Select none
15 - Pick a nice looking font and add your name or watermark
16 - Image; Resize - Height 500 px - Width will sef adjust
17 - Save file as jpg
That was it again for now, I hope you enjoyed it and that it was easy enough to follow through.
Love from Hanny
|