|
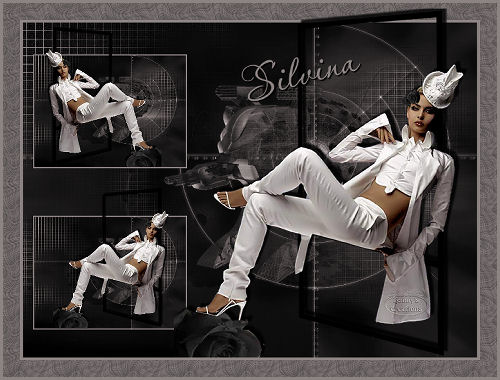
Silvina
Plugins:No
|
Silvina
Plugins:No
1 Tube. A background and a texture
All other materials available Here
Save them into the file of your choiceOpen in psp
Take along this arrow to where remember you have remained

1 - Open a new image Width 800, Height 600
Select all
2 – Open Kickbot-freaky- background
3 – Edit- Copy – paste in to selection
4 – Select none
4 – Adjust – Hue and Saturation - colorize
5 – H255 - S 11
6 – Layers – duplicate ( shift D)
7 – Image resize Height 200, Width will adjust
8 – Image – add borders #8c8383
9 - Edit- Copy – paste as new layer
10 – Layers – duplicate- put it in position , see example
11 – Open 238_silvana_orsi_febrero_26_2009
12 -Image – duplicate ( shift D)d
13 - Image resize Height 250, Width will adjust
14- Edit- Copy – paste as new layer
15 - put it in position
16 – Layers – duplicate – mirror and put it in position
17 – Layers – merge – merge all layers (flatten)
18 – Image – add borders 5 pixels #8c8383
17 – Image – add borders 50 pixels # 1d1b1b
17 - Image – add borders 5 pixels #8c8383
18 – Select large border with your magic wand
19 – Materials - Open your texture as foreground color , click with your dropper in the # 8c8383 border
20 – Select fill tool and flood fill the large border, now its filled with your texture
21 - Select none
21 – 0pen – Open 238_silvana_orsi_febrero_26_2009
22 - Image resize Height 625, Width will adjust
23 - Edit- Copy – paste as new layer
24 – put it in position
25 – Layers – merge – merge all layers (flatten)
26 – Write a name with a nice font, add watermark and initials
27 – Layers – merge – merge all layers (flatten)
28 – Image resize Height 600, Width will adjust
29 – Save as jpg, compression value 2o
Nice short lesson with a beautiful result
The lesson is done, have fun Hanny
Translator Rita