|
Burning Cognac
All other materials available: Here
4 Tubes, a mask, a texture and a font
|
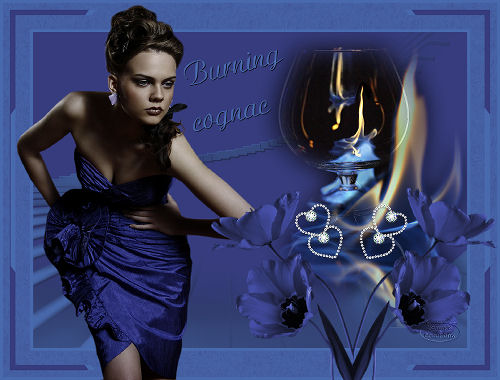

Burning Cognac
All other materials available: Here
4 Tubes, a mask, a texture and a font
Save them into the file of your choice
Open in psp
Take along this arrow to where remember you have remained

1 – Fore ground color #363c7d , Background color #4869ac
2 - Open a new image Width 800 Height 600
3 – Flood fill with your foreground color
4 – Layers- new raster layer, flood fill with background color
5 – Layers – load mask from disk masque2_michele_claire
6 – Luminance of source checked, adjust to canvas checked
Hide all masks checked
7 – Highlight layer 2 – effects 3d effects – drop shadow 1 1 100 1,00 color black
8 – Open Cal_guis_verrefeu_10112008
9 - Edit-Copy-paste as new layer , put it nice on it’s place
10 – Layers – merge- merge all layers (flatten)
11 – Image- add borders 5 pixels #4869ac
22 – Image- add borders 50 pixels # 363c7d
13 - Image- add borders 5 pixels #4869ac
14 – Select large border with your magic wand
15 - Find your texture and place it in the foreground color box, click with the dropper in the colored border #4869ac
16 – Flood fill the border with the texture
17 - Select none
18 –Select all
19 – Selection modify - contract 18
20 – Layers- New raster layer – flood fill with #4869ac
21 – Selection modify- contract 10
22 - Press delete button
23 – Selection – select none
24 – Select with your magic wand the large border
25- Effects Reflection - Kaleidoscope
All 0 - Right top 10, color checked and #363c7d
26 – Effects 3D effects - outer bevel
27- Open 35 – Open Cal_guis_25_07_2008_robe_Du_soir_blu
28 - Image resize Height 720, Width will adjust
29– Edit- copy- paste as new layer
30 – Open 2024flower 35AR821 Alejandra Rosales_11_2_07
31 – Image resize Height 400 Width will adjust
32 – Adjust – Hue and Saturation – colorize
33 – H 166 - S 102
34 – Edit- copy- paste as new layer
35 – Image mirror , put it nice on it’s place
36 - Open cuori Edit- copy- paste as new layer
37 – Layers – duplicate – mirror - put it nice on it’s place
(you are free to add a glitter animation )
38 – Layers merge- merge all layers (flatten)
Lock your foreground color
39 - select your text tool and write with the back ground color a nice text
Add your initials or watermark
40 – Image resize Height 625, Width will adjust
41 – Save as jpg compression 2o
Very nice lesson with a beautiful result
The lesson is done, have fun, love Hanny
Translate from Rita