|
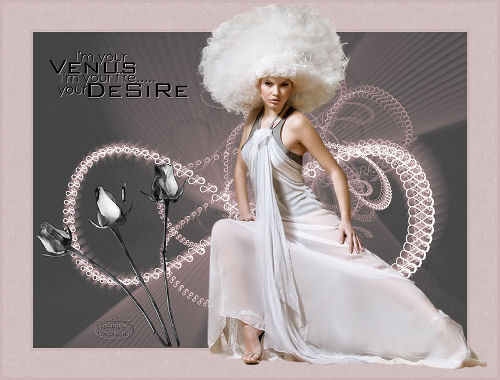
Venus
All other materials available: Here
3 tubes , a background, a texture and
a wordart
|
Venus
All other materials available: Here
3 tubes , a background, a texture and a wordart
Save them into the file of your choice
Open in psp
Take along this arrow to where remember you have remained

1 - Open a new image Width 800, Height 600 select all
2 – Open infinity 2 background
3 - Edit-Copy-paste in to selection
4 – Adjust-Hue and Saturation, colorize
5 – H 252 - S 44
6 – Layer opacity 73
7 – Image- add borders 5 pixels #81768b
8 - Image- add borders 50 pixels # ebe8ef
9 - - Image- add borders 5 pixels #81768b
10 – Select large border with your magic wand
11 –Find your texture and place it in the foreground color box, click with the dropper in the colored border #81768b
12 – Flood fill the border with the texture
13 – Select none
14 – Open KS Pluisebol_Image 2-17-2-2009 lady
15- Image resize Height 700, Width will adjust
16 Image mirror
17 – Edit-Copy-paste as new layer
18 – Open @nn_210408_bloemen_rozengrijs_tdstudio_small (flowers)
19 – Image resize Height 300, Width will adjust
20 – Edit-Copy-paste as new layer
21 Layers - Merge – merge all layers (flatten)
22 – Layers-new raster layer
23 - Open je WSL Wordartmix6 en find your text
23 – Edit-Copy-paste as new layer
24 – Image resize 80% n all layers not checked
25 – Drop shadow V 1 - h 1 - d 100 - blur 1,oo, color #d7cbcd
26 - Add your initials or watermark
27 – Layers - Merge – merge all layers (flatten)
28 – Image resize Height 625 , Width will adjust
29 – save as jpg compression 2o
Nice short lesson with a beautiful result
The lesson is done, have fun, love Hanny
Translate from Rita