|
Orchidee
All other materials available Here
Materials 3 images
Take along this arrow to where remember you have remained
|
Orchidee
All other materials available Here
Materials 3 images
Take along this arrow to where remember you have remained

Materials - Image a Favorite-jpg; a Background image; tube-goldenorchidee
Filters Dragonfly Sinedot 2 Bordermania-Frame 2
Mask 20-20 in PSP Files folder - sub-folder Masks
Put all the materials in the folders of your choice; Filters go into your Plugins folder
Open all your materials in PSP
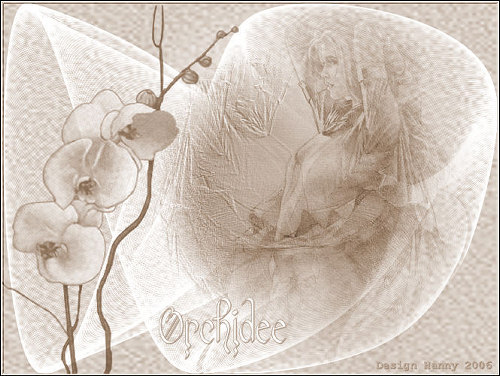
1 - Open a new Image, 800px High by 600px Wide; Select All; Set your foreground color to #cab5a2 and background to #faf9f7
2 - Open your background image; Copy; Paste into Selection; Select None.
Adjust; Colorize: Hue 19 - Saturation 70; Layer Opacity 71.
3 - Effects DragonFly Sinedots 2 Settings see print-screen
4 - Open your image Fay-xJpg
5 - Load Mask from Disk; Mask 20-20
6 - Layers, Remove Layer.
7 - Image - Mirror
8 - Edit - Copy; Edit - Paste As New Layer
9 - Effects - Texture Effects - Emboss
10 - Adjust - Colorize, Hue 19 - Saturation 70; Layer Opacity 71
11 - Image is still in the meomory, Edit - Copy - Paste As New Layer; Colorize settings like in step 10
12 - Open the golden orchidee image; Resize - Height 600px Width will self adjust
13 - Edit - Copy - Paste As A New Layer; Image - Mirror and move it to the left side
14 - Colorize like settings in step 10. Layer Opacity 71
15 - Layers - Merge Visible Layers
16 - Image - Add Borders - 1px #cab5a2 - 1px #faf9f7 - 1px #cab5a2
17 - Effects - Border Mania Frame 2 - Settings: 2 - 2 - 110 - 130, Notch Corners Checked
18 - Click your Text tool and look for font Cupie-Doll; Type your text or your name or your watermark.
19 -Layers - Merge All Layers
20 - Image - Resize - 500px high or your own preferred height; Width will self adjust
21 - File - Save As jpg file.
Well, this was yet another one, I hope you'll enjoy doing this one.
I hope it was easy enough to read and follow through. Good Luck and much love from Hanny
And translated by Tini
Back